
How to set Automatic Replies in Outlook Web Application
These set of instructions, show you how to use the automatic reply.
1. Click on the Settings icon in the top right hand corner

2. Select the “Mail” option and then the “Automatic replies” option.

3. Press the radio button to turn on automatic replies
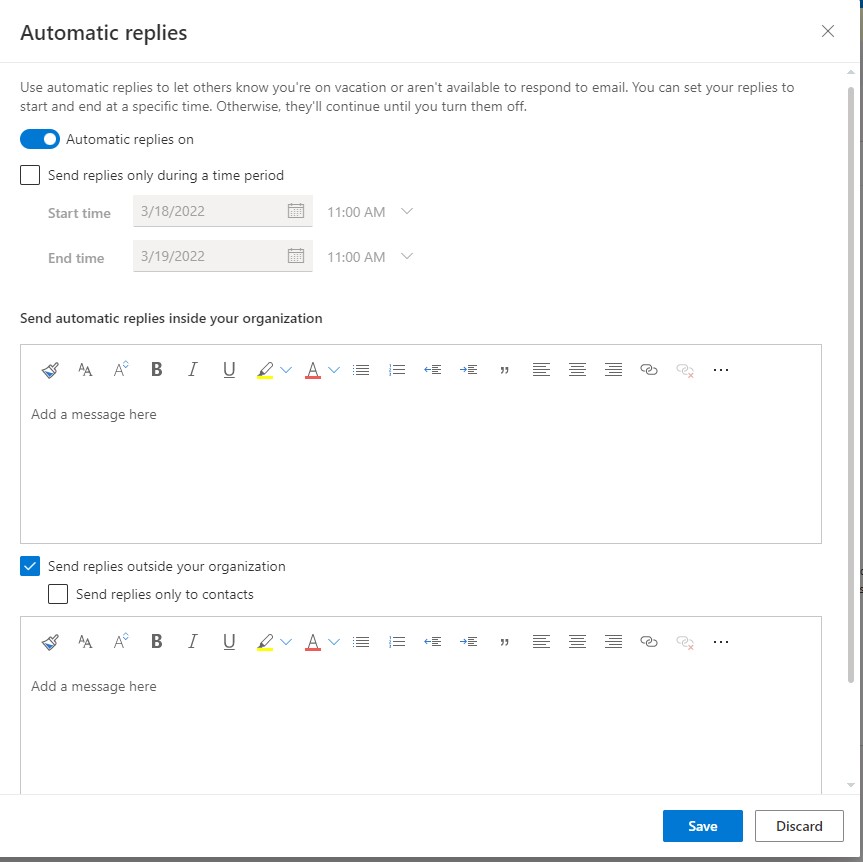
4. You can select a timeframe
-This will allow you to select the start time and end time of your automatic replies.

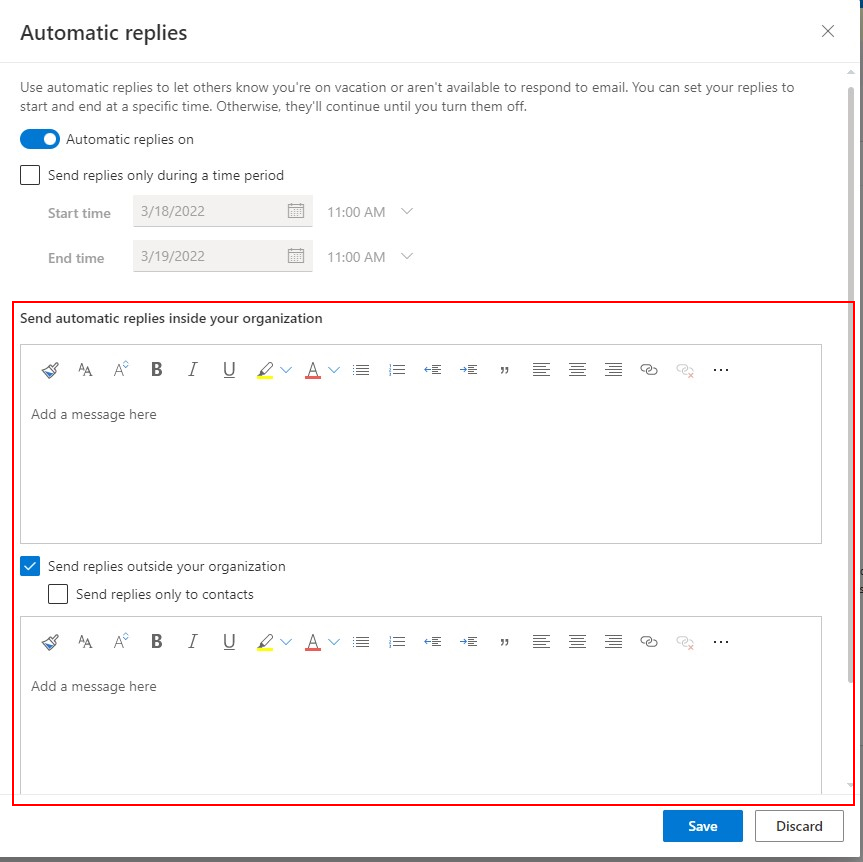
5. The next section is where you will put the internal and external messages. Please note you will have to put the message in both boxes if you would like it to go to both internal and external addresses.
–Internal would be inside your organization
-External would be anyone outside of your organization. You can also select to only send to your contacts.
6. Click the blue “Save” button in the lower right.

7. Once you are done with your automatic reply, you can turn it off and it will no longer send the reply.
-Turn it off by pressing the radio button next to “Automatic replies on”