
Calendar in Outlook Web Application
These set of instructions are for anyone looking for more information regarding the calendar inside of the Outlook Web application (OWA).
Login into your OWA account here
1. Select the calendar button on the left hand side.

This will open up your calendar
-You will be able to go to each day for the year.
2. There are two ways to add a new event.
-You can press the new event button in the top left of the calendar or
-You can double click on the date to which you would like to add the event.

3. Once you press the new event button or double click the date, it will open a pop-up.
-This is where you can put the information for the calendar reminder.

4. In the calendar invite, there are several different options.
-Scheduling assistant. (This will open another popup that will show you the day you clicked on with the time)
–If you click on add attendee in either required or optional, it will show their availability for the day.
-You can also change the time of the meeting at the top of the pop up and whether it is all day or not.

5. Under response options, you will have 3 different options.

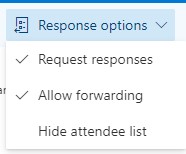
-Request responses requires the attendee to select a response.
-Allow forwarding will allow attendees to forward the invite to others.
-Hide attendee list will show you the attendee list but will not allow other attendees to see the list.
6. Under Busy you will have 6 selections


-Free means that you have something on your calendar, but you can still be scheduled for other events
-Working elsewhere means that you are not in the office.
-Tentative means there is a meeting scheduled, but unsure if that is the correct time/date.
-Busy means you will unable to do anything else, you are busy.
-Away means you will be away for this meeting
-You can select private, where no one else will see the meeting outside of the attendees.
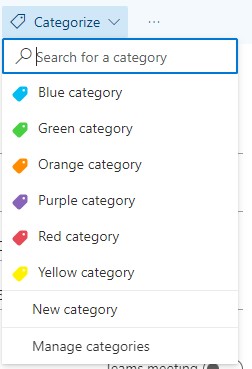
7. Categorize will give you the option of selecting different color flags for the meeting
8. Add a title: You can enter a title for the meeting
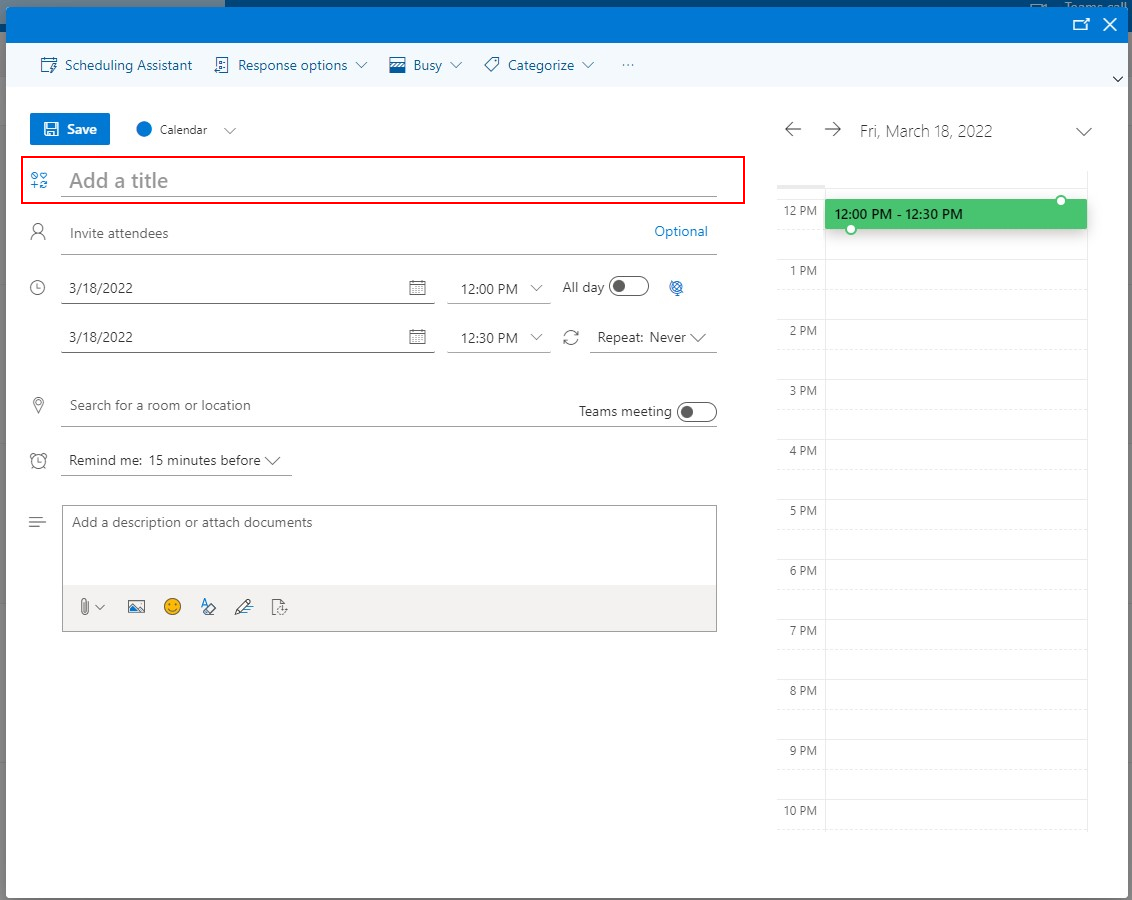
9. Invite Attendees – There are required attendees and optional attendees.
–Required attendees- Are the individuals that need to be present during the meeting.
-Optional attendees – Are the individuals that don’t necessarily need to be present.

10. In the below field is where you can change how long the meeting will last.

–The first field will be the date and time that the meeting will start. If this meeting will be all day you can select the All Day Radio button.
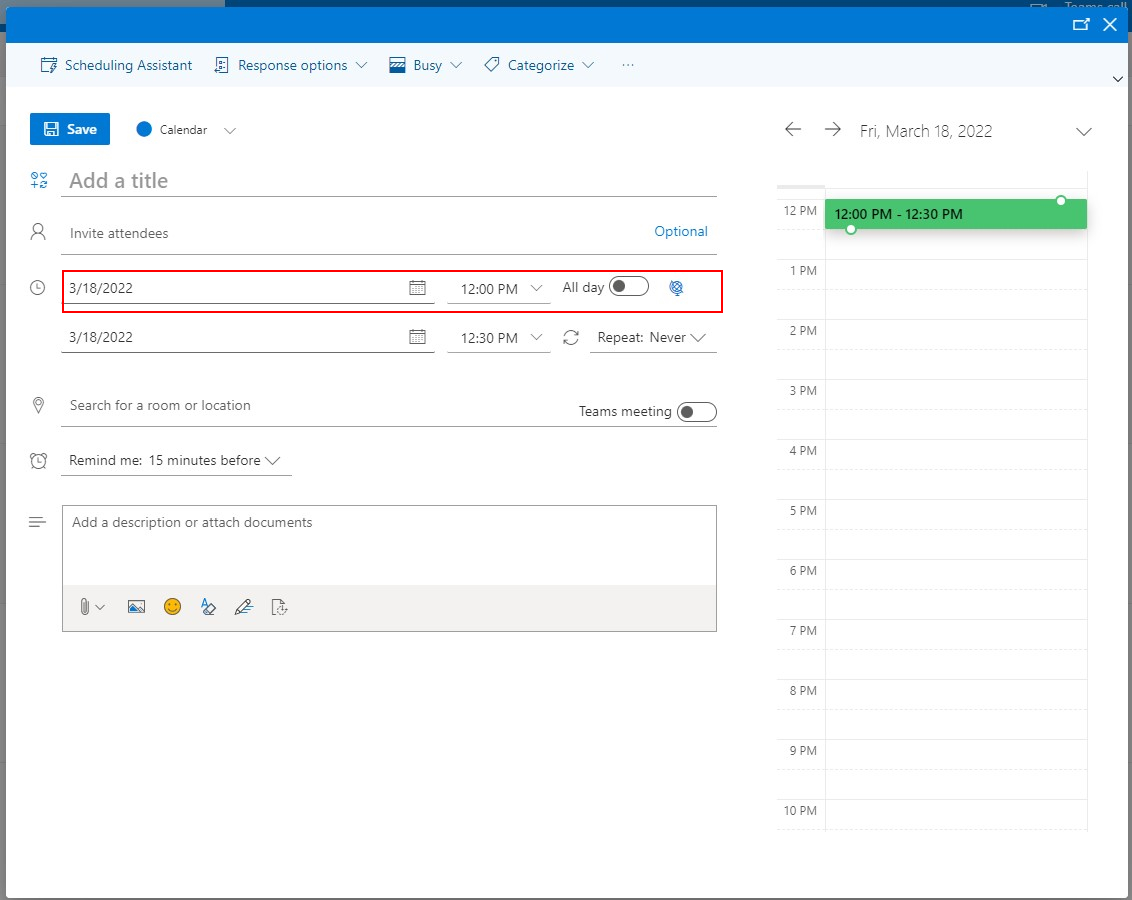
-If the meeting will not be all day, you can select the date/time that it will end.
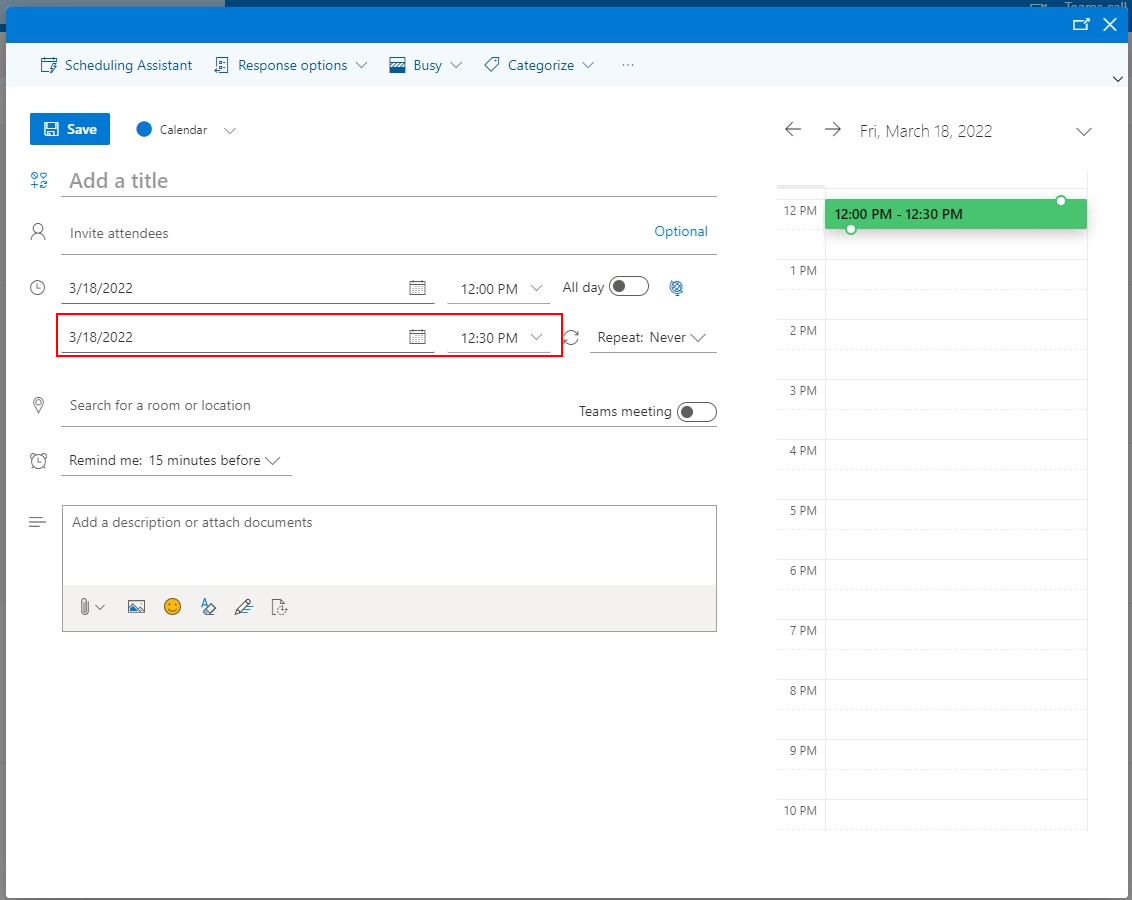
-In the next section, you can determine if you would like this meeting to be on repeat for a set number of days or you can select never and it will never repeat.
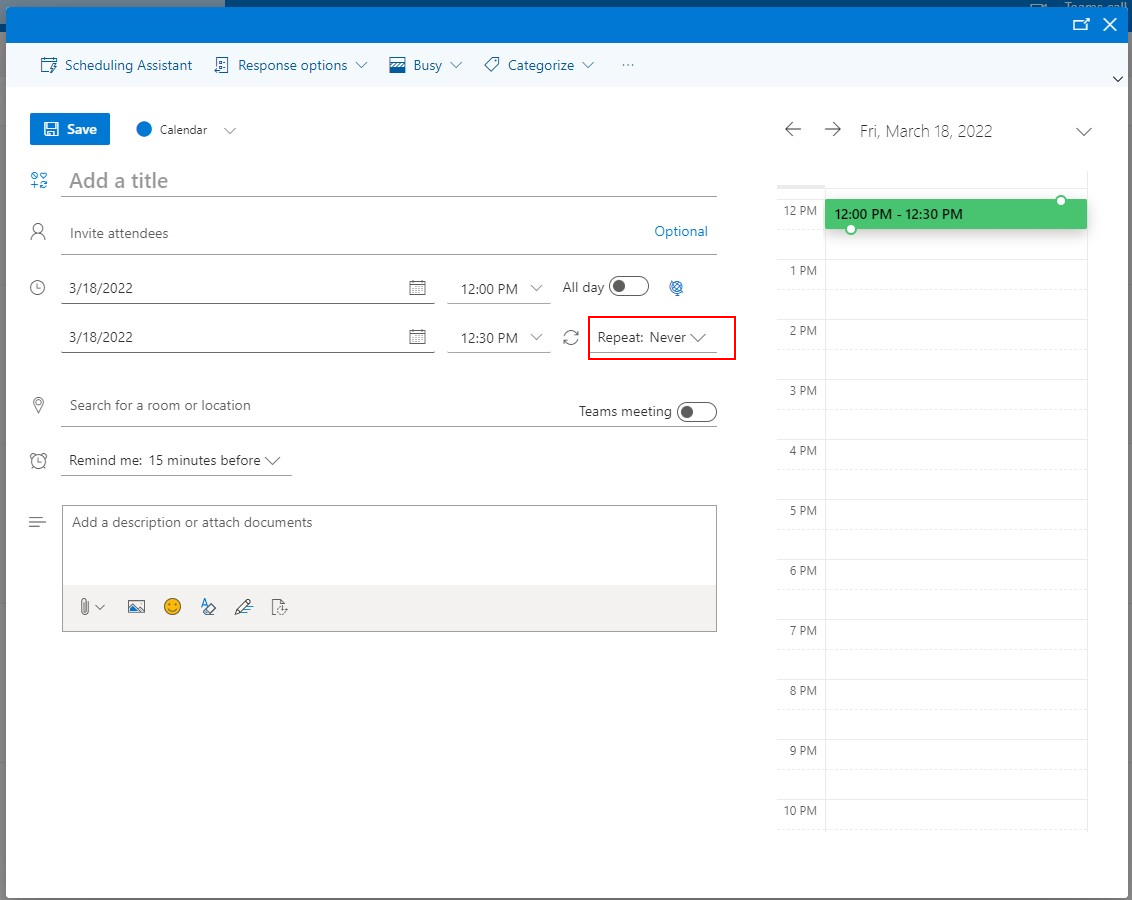
-Below are the options for the Repeat dropdown

11. If your organization has a room or location, you can select that here.
You can also select if this will be a meeting held in Microsoft Teams

12. The next selection is if you would like to receive a reminder for the meeting
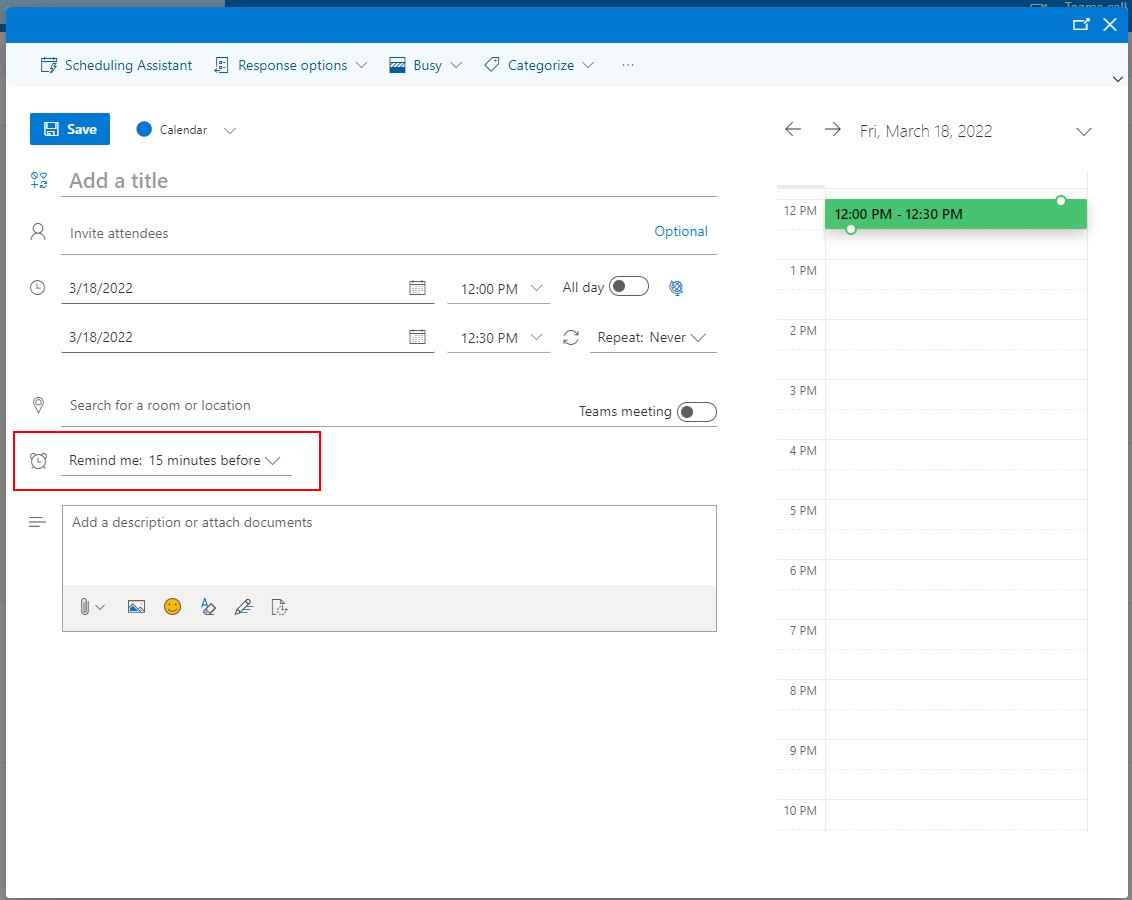
-Below are the options for the Remind me dropdown

13. The next selection is where you can put comments in for the meeting.
-You can also attach documents in this field for the meeting.
