
Creating Rules in Outlook Web Application
This page includes a set of instructions on how to create/add/manage rules in Outlook Web Application.
There are a couple different ways to get to the rules section in your Outlook Web Application.
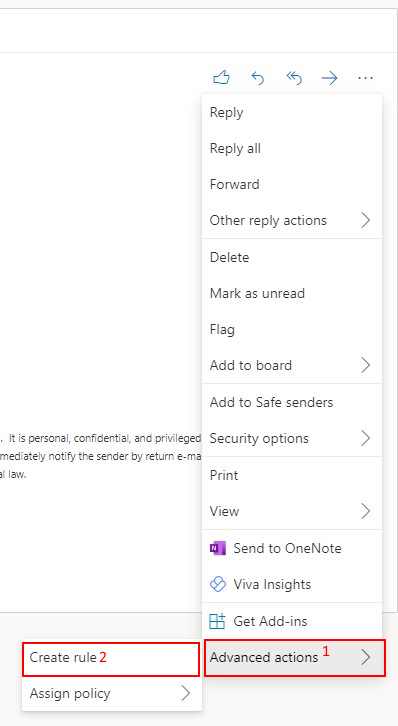
1. You can right click on an email, this will bring up a drop down menu.
-(1)Select Advanced options (will open another sub-menu)
-(2)For the other sub-menu, select “Create rule”
2. This will open the below window.
-Click on the drop down and anytime that sender sends an email, it will be redirected to the folder you select.
-You can also select “More options” which will take you to the advanced options for rules. (See step 3)
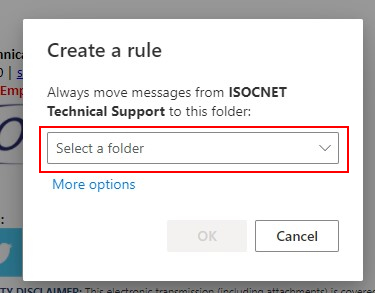
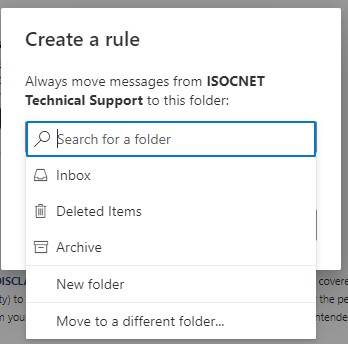
-This is where you will select which folder you would like the sender to go to each time they send you an email.
3. There are two ways to get to the advanced options field for “Rules”
–One way is by following step 2 and selecting on the “More options” button under the “Select a folder” dropdown
-The other way is to go into settings

4. Select “View all Outlook settings” at the bottom.

5. Select the “Mail” option and then the “Rules” option. (This will show you a list of your current rules, if you have any)

5. From this location, you can do one of two things. You can create new rules and or you can modify your current rules.
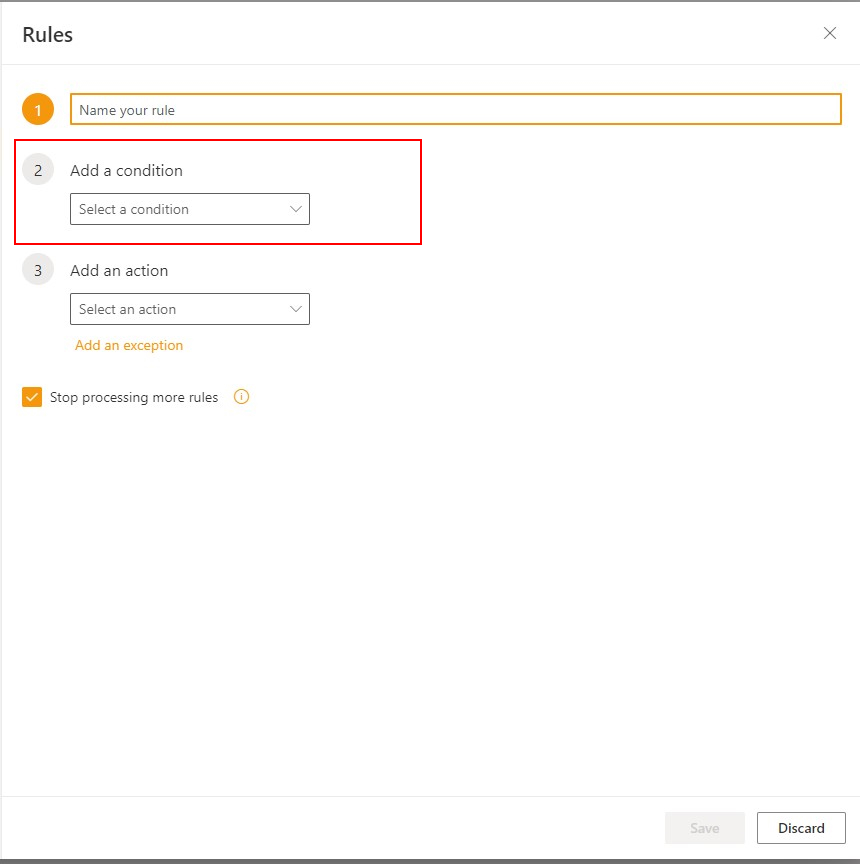
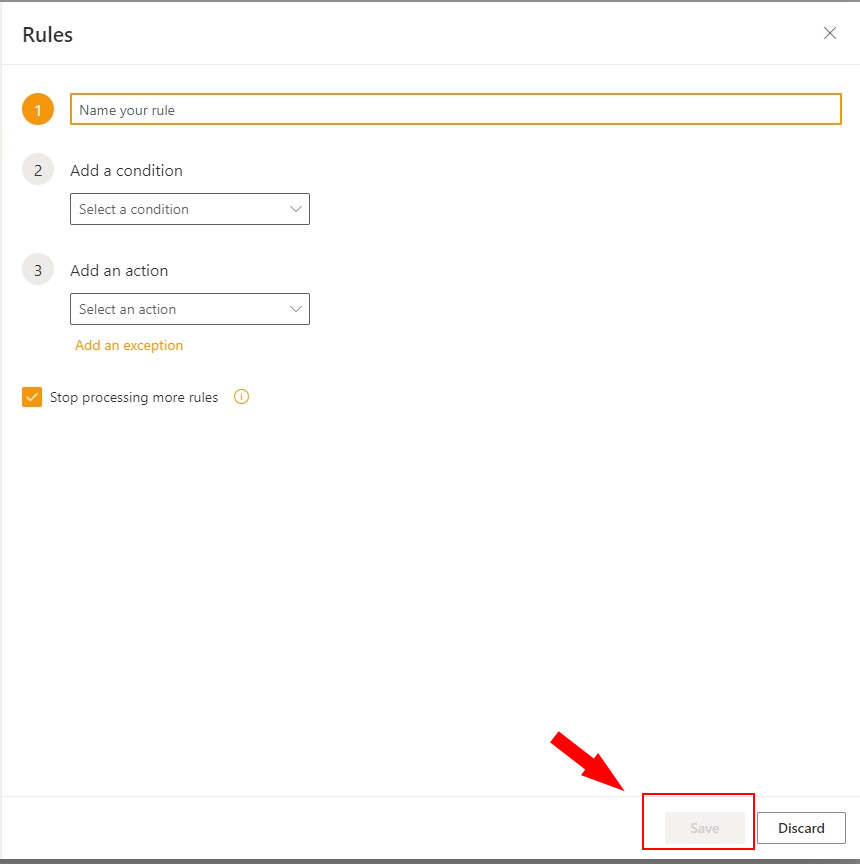
-By selecting “Add new rule” you will open the below list of things.
a. Name your rule. This is what will be shown as the display name in the list of current rules.
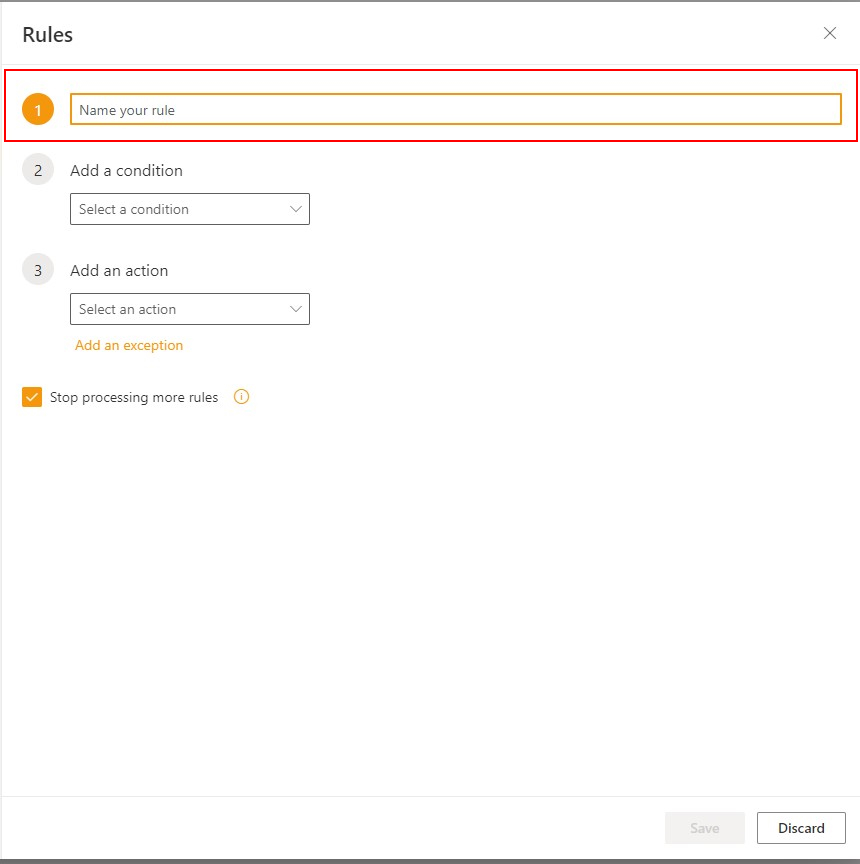
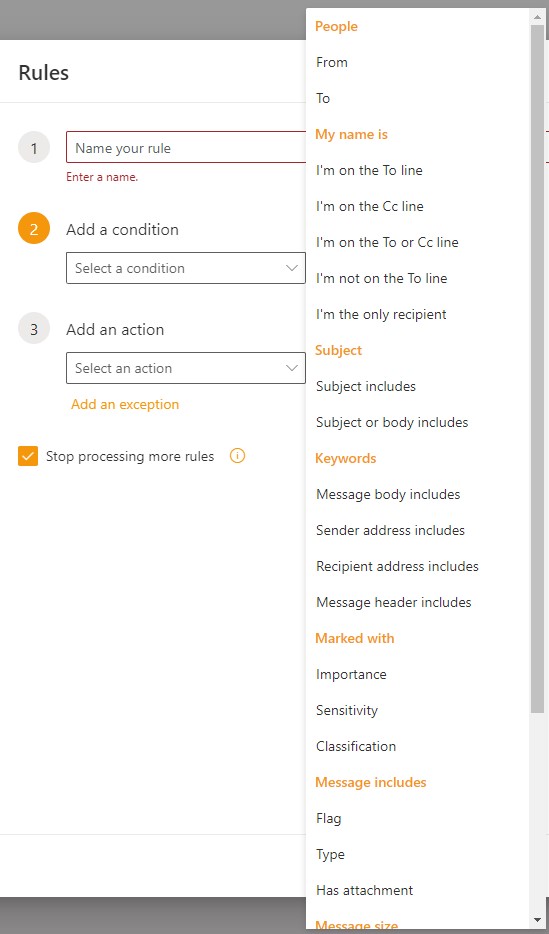
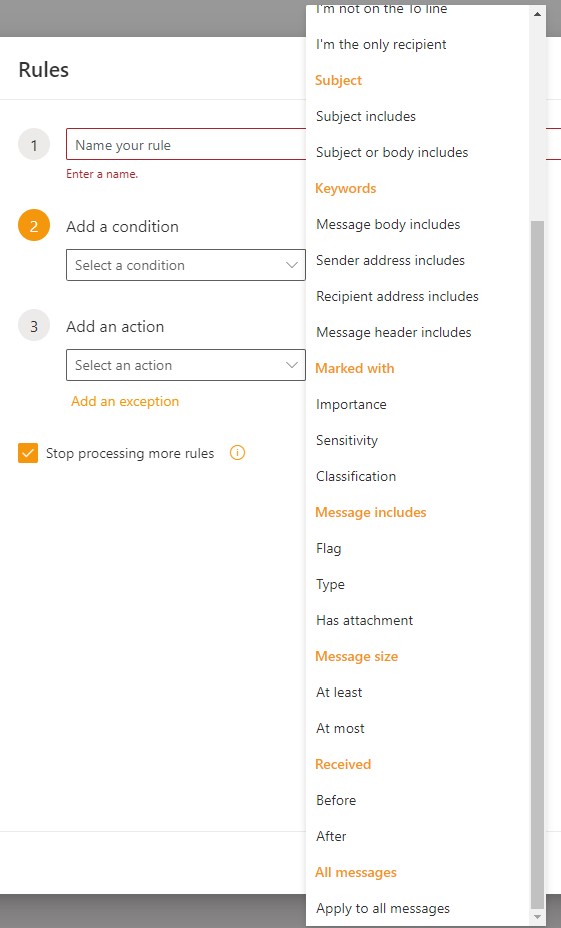
b. Add a condition. Select a condition from the drop down.
-The dropdown gives you the below options to choose from.
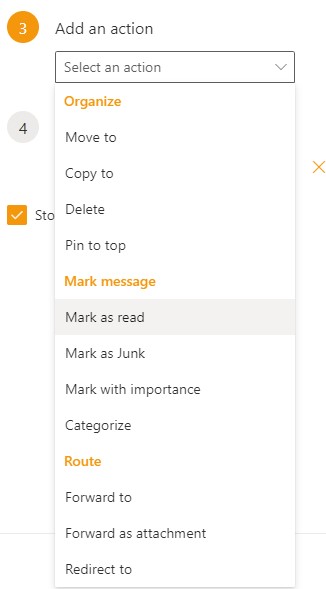
6. Add an action. this will determine what will be done if the condition is met.

-Once clicked it will produce the below drop down (this is where you will select the action to be performed for the rule)
7. You can select the “Add an exception button”
-This will allow you to add an exception to the rule you created.

-This will generate an additional drop down menu that has the same options as the “Add a condition” dropdown.
-The exception will be ran inside of the rule that you created.
8. Once complete, select save in the lower right hand corner.
-You can also select discard if you do not wish to save the rule.
9. Your rule will now show up in the list of rules and will begin processing all inbound emails according to the rule parameters.