
Creating a Shared Folder in LastPass
The below set of instructions are made for creating a Shared Folder in LastPass.
This allows you to share passwords among others.
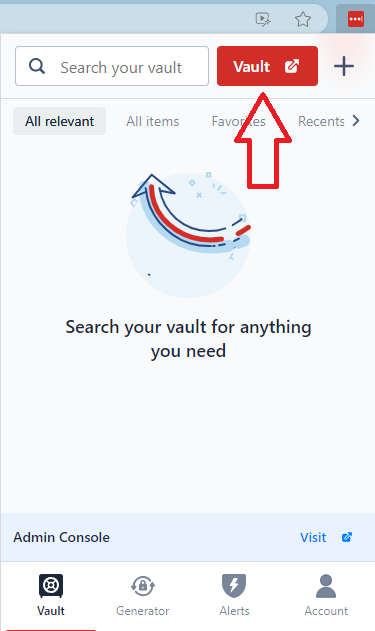
1. Enter your LastPass extension and Click on Vault.
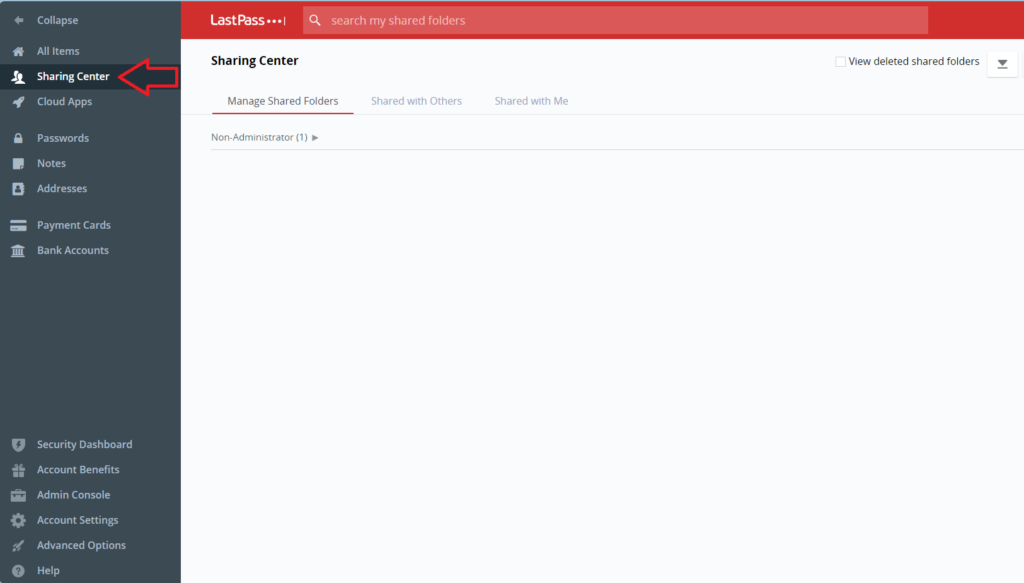
2. After you enter your vault, Navigate to the Sharing Center.
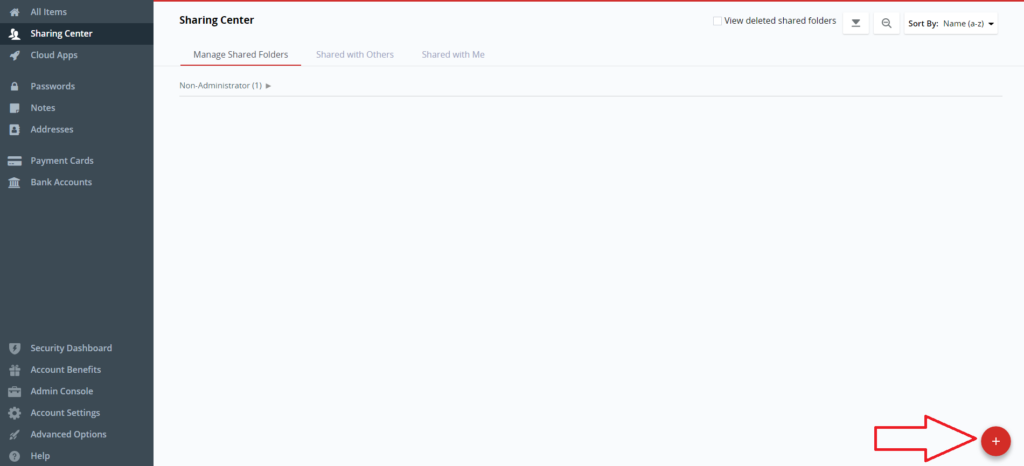
3. Click the red Plus sign circle in the bottom right-hand corner.
4. It will pop up the Create New Shared Folder box, go ahead and enter your folder name.
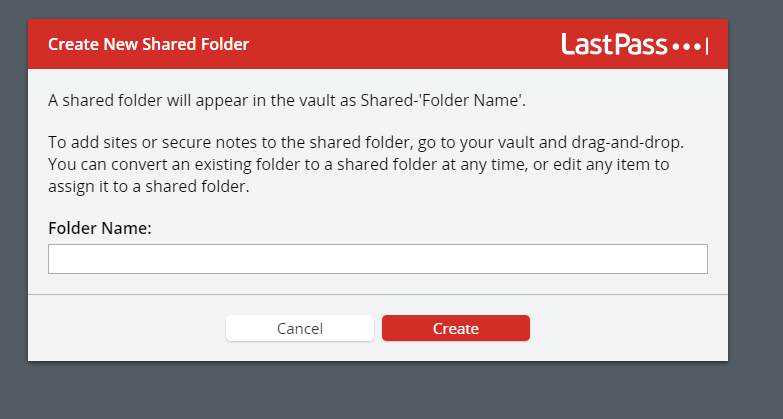
5. Click the create button after naming your folder.
6. The folder should appear in your vault. Go ahead and click Manage recipients.
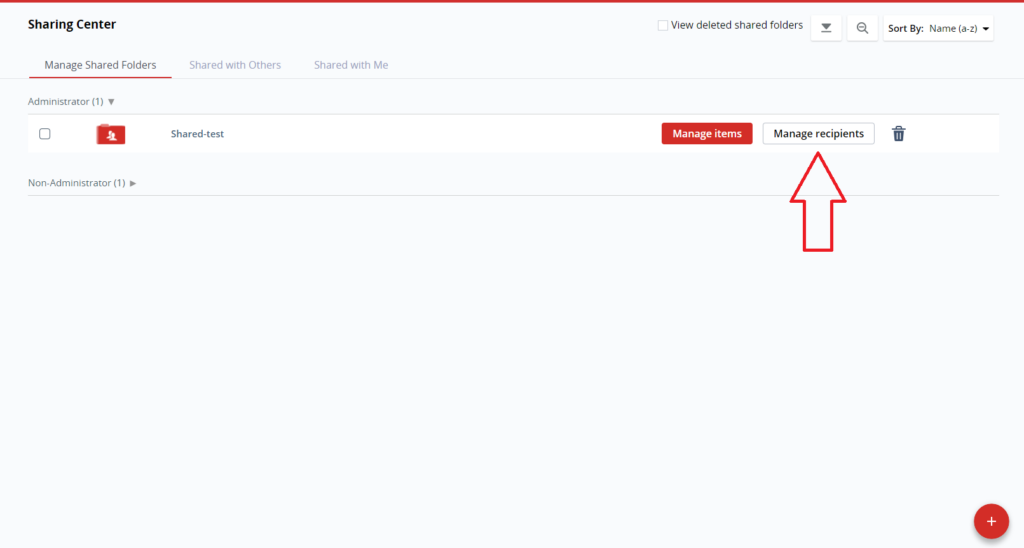
7. This will let you manage who has shared access to this folder.
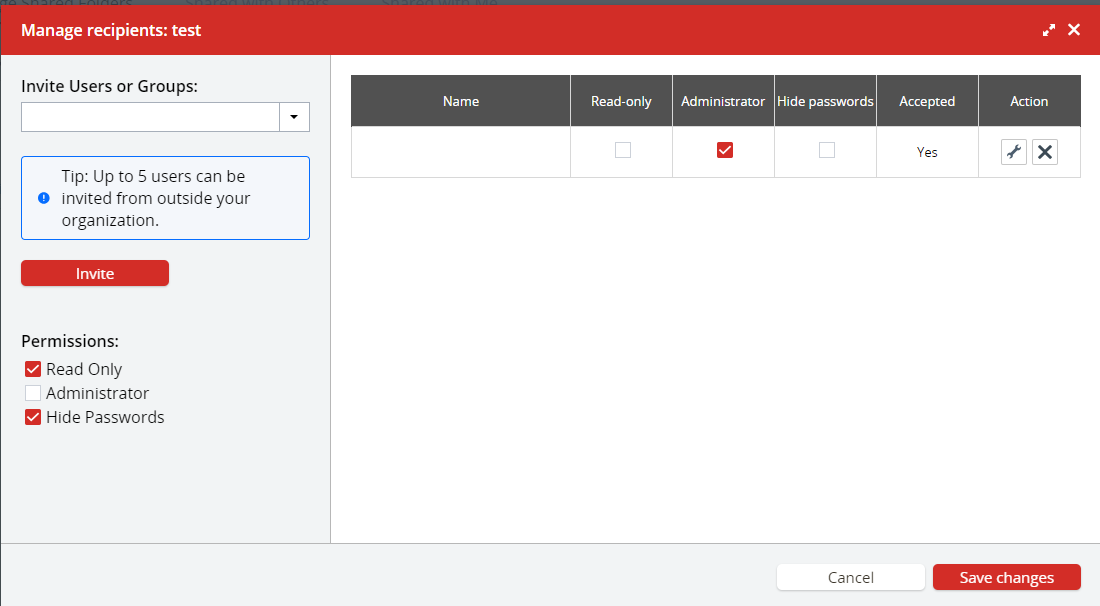
8. The box below lets you invite the users inside your domain to your shared folder and control their permissions.
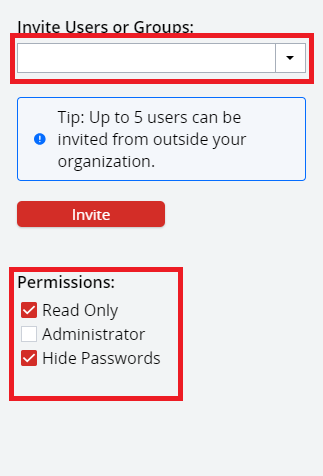
9. Read Only – Makes the user be able to view the password and use it but cannot edit.
10. Administrator – The user can read/view/edit the password.
11. Hide Passwords – The shared user can only use the passwords, but cannot see them, or edit them.
12. After you enter the permissions and users, click the invite button and it will send them an invite.